Wednesday 8 March 2017

       How to Remove Write Protection From USB Drive or SDcard

You must have something like this before and you are wondering if your USB drive has been damaged or not. Or perhaps while trying to transfer files from your PC to USB Flash Drive you received an error message - The Disk cannot be written because it is write protected. Please remove the write protection from the volume in drive \Device|Harddisk1\DR5.

Occasionally, USB drives can become write-protected due to a manufacturer setting or because of a fault in the disk.

However, I’m going to show you how to remove this setting, giving you the capability to modify, copy, or delete any files from your USB drive.

How to Remove Write Protection From USB Drive
This method will fix it once and for all for you
>> Press Win+R (This will open the registry editor)

>>Type in regedit and hit the OK button
>>Expand and collapse the entries on the left to navigate to the following location: 

  • HKEY_LOCAL_MACHINE\SYSTEM\CurrentControlSet\Control\StorageDevicePolicies
  • If you don't have a StorageDevicePolicies folder in the Control folder, right-click in the folder and select "New" → "Key." Name it StorageDevicePolicies and then open it.
>>Double-click the WriteProtect key located in the right side pane and set the value to 0. Go to the Data Value box and press OK:

Reboot your computer and reconnect your USB drive to the system, the drive should now be writable.

However, if you’ve carefully followed the above instructions and you are still unable to restore your drive back to normal, then your last option will be to format it which might be a pain in the ass.

Sunday 1 January 2017

HOW TO FLASH A CUSTOM ROM
Flashing your ROM means in loose terms installing upgraded/modded versions of Android operating systems to your device. The open-source nature of Android makes this very possible and is also one of the reasons that Android, without a doubt, hands down, with all it quirks, is the best OS running on mobile devices today.
  There are different versions of stock ROMs from different manufacturers, either running pure stock android, or a modded version of Samsung's TouchWiz.

It happens a lot; phone manufacturers stop releasing updates for devices, and we, the people, are left wanting, well, at least until this guide showed up 👌.

Why Flash Your Phone?

Flashing your phone's ROM can help with the following:
  • No New Updates From ManufacturersNew phones come out anyhow all over the place, so the newer models of a series of phones are favored to get new Android version updates, and the older models are left in the dark, usually because of outdated hardware.A lot of phones older phones are capable of running newer versions of Android, and flashing your ROM can help you get all those sweet new features. A very good example of these phones is the Samsung Galaxy S3.
  • Bloatware: You can easily delete or get rid of bloatware (useless apps that come pre-installed on your phone).
  • Extra Customization: mentioned android being open source, add a very before that, you get a very open source. I mean with custom ROMs you can change and customize the UI and how your phone operates.
  •  You get more frequent OTA (Over The Air) updates to fix bugs and issues.
  • Better Performance and EfficiencyCustom ROMs are often faster, more efficient, and use less memory because the developer might have already ripped out the useless garbage, such as carrier installed apps or optimized the kernel. For example, an undervolted kernel can provide a much better battery life than the stock one. (Undervolting is a trick used to reduce heat evolved and increase the efficiency of electronic devices, especially PCs.).

Important Notice 

Flashing your ROM is cool and all, with all the extra perks it seems to good to be true, but of course there are potential drawbacks.
  1.  First of all, something may go wrong with the flashing process and leave your phone bricked. The chances of this are pretty low nowadays, and most of the time you can restore it back to normal. Try to pick a ROM that has a lot of positive feedback.
  2.  In order to install a custom ROM, you need to perform a clean wipe. This means you will lose all existing data, so you have to back up everything first.
  3.  You may void your phone's warranty, and rendering it useless when you might want to invoke it with your manufacturer. The benefits of flashing outweigh the warranty so, just be careful.
  4. Finally installing a ROM not compatible with your device may result in your phone bricking during the flashing process, or it m ay install and run horribly or not run at all. Always make sure you get the right ROM for your phone model.
We want to mention before we get into it that if anything goes wrong during or after the flashing process, we are not liable. Of course, we know there are always risks and we're willing to help, as long as you don't do anything crazy, you're good. Nevertheless, flash at your own risk.

What You'll Need.

  • Root: This guide teaches how to flash with TWRP (Team Win Recovery Project) Recovery Mode, and TWRP requires root access to flash. While stock bootloader doesn't, we advise you root your phone anyway. I recommend KingRoot App, it is easy, quick and efficient. Rooting comes with its own risks, so do so responsibly.
  •  An Unlocked Bootloader with Custom Recovery Installed: Unlocking your bootloader varies across devices, so this guide for installing TWRP should help a lot. 
  • The Actual ROM: I mentioned that there are a lot of custom ROMs out there, so finding the right one for your device might take a while, but you can do that by googling " 'YourPhoneModel' custom ROM". The most trusted ROMs are from CyanogenMod, so go through there or you could snoop around XDA-Developers.
  • A microSD Card to hold the ROM file temporarily. Preferably empty and 8GB or more for backups.
 Do not proceed unless you have the above.

Actual Flashing Process

Here we go! I am going to do a somewhat stripped down version of the process for the people who want this done quick.

1. Power on your phone and plug it into your PC to access the SD card. Locate where you downloaded your ROM to and paste it to the root of your SD card. include any other .zip app packages you want to install like GAPPS (Google App Packages) if your ROM doesn't come with it.
2. Power off the device and then boot up to recovery.
3. In your phone's custom recovery bootloader, locate the menu options which allow you to wipe the phone.

 Whenever changing ROMs, it is a good idea to make a backup first, then Factory Reset, before flashing the new ROM, or if the ROM you want to flash comes with an Aroma Installer, you can do the standard full wipe in Aroma as it usually comes with that option before proceeding with the installation.

4. Select "Backup" and choose what you would like to backup, the files are usually large so if you encounter any errors with space you might want to delete some things off your SD card.
Image Credit: HowToGeek

5. Go back home and select wipe, then factory reset.


6. Once your phone has been wiped, go back to the root of the menu and select "Install".
7. Locate the ROM .Zip file you wish to flash.
8. Confirm the flash by swiping the screen.
9. After the ROM successfully flashes, you can go back and flash GAPPS or any other .zip app package from Step 4.
10. When it’s done, tap the “Wipe cache/Dalvik” button that appears and swipe to confirm.

 Once the cache has been wiped, tap the “Reboot System” button to boot back into Android.

If TWRP asks if you want to install SuperSU now, choose “Do Not Install”. Some ROMs, like CyanogenMod, will already have root access available in the settings, and for any that don’t come rooted, it’s probably best to flash SuperSU yourself. (Or use KingRoot again.)

It may take a while to reboot your phone the first time remember, this is your first time booting a new operating system, so it has to get everything ready for you. Give it time.

If anything goes wrong or the phone won’t boot after a significant amount of time, reboot back into TWRP and restore from your backup, or try flashing again. Make sure you downloaded the correct ROM files, as well.

Well, that was it. I had a good time writing this because I too had days of struggling and failing with flashing. If this guide helped you, leave a comment and share it with your friends.

Sunday 4 December 2016

12 Useful Things You Can Do With Your Smartphone Camera Aside of Snapping Pictures
A camera phone is a mobile phone which is able to capture photographs. Most camera phones also record video. The first camera phone was sold in 2000 in Japan, a J-Phone model, although some argue that the SCH-V200 and Kyocera VP-210 Visual Phone, both introduced months earlier in South Korea and Japan respectively, are the first camera phones. Read more on Wikipedia.

Taking or capture photographs is the most used feature of smartphones and lots of people think that's where the use of the camera ends in a mobile phone.

Some people only snap pictures with their camera phone and they think that's where the use of the camera ends in a mobile phone, not knowing that there are lots of amazing things only a camera embedded in a device can do. Here's a list of 12 Useful Things You Can Do With Your Smartphone Camera Apart From Snapping Pictures.

1. Document Scanning 
Have you been required to scan and send your document to companies, institutions, and any organization, probably for Job, or scholarship applications etc, through email or to be sent to the cloud. With your phone's camera right there with you and with any document scanning app being installed on your smartphone, that means you can achieve that so easily. Instead of going to a cyber cafe or using a traditional scanner hardware, your phone's camera can do that for you.

The apps that can see you through, having that your phone's camera is intact are as follows: Evernote app and Scanbot app are meant for iOS users, while Google drive is for only Android users, and CamScanner for Android and iOS users.

Note: The scanned document can also be converted into editable text. Just check the detail here.

2. Play Augmented Reality Games 
Augmented reality in phones has been around for some time now and tools like AR translation apps are great, but nobody ever seems to show you how to use the technology for fun. That shouldn't stop you using your phone's ability to play augmented reality games though - no matter where you are.

There are plenty of them about, like SpecTrek - the game where you search for virtual ghosts using a map and then shoot them down when you find them. Or there's Zombies, Run! where you have to get from A to B on a map, avoiding those pesky flesh eaters en route.

A word of warning: be very careful about running around and shooting at things in a city filled with real people, as you might get some funny looks, especially if you're old enough to know better.

 Another augmented reality game is Droid Shooting. Turn any real-life boring background into a real life shooting fest as you deal with waves upon waves of droids that will come and attack you. Droid Shooting utilizes your phone’s camera and makes it a viewfinder or HUD (Heads-up-display) for the battlefield. You will also find a radar at your disposal, so you’ll always know where those vicious droids plan to attack.

The game entertaining you as if the whole thing is real. Enjoy the game as your phone's camera delivers the service.

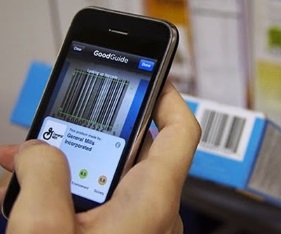
3. Barcode Scanner

Your phone's camera can be used to scan barcodes in order to get the information written on it, Since anything programmed into it, is always not visible for the naked eyes to see, but can only be known through the use of any barcode scanner app controlled by the camera. If you are using WhatsApp web on your PC, you must have come across the point where you will be asked to scan your barcode, in order for you to access and use your Whatsapp chat on PC.

You can also find a barcorde scanner in UC browsers. So, whenever you have any multiple lines of marks just in the form of several straight lines together, just use your barcode scanner app or UC Browser to scan the lines. Note, once you are scanning the camera will be active at work.

4. Language Translator
With your phone's camera, you can be able to translate the language in the form of text and symbol that seems to appear strange to you. And you can achieve that with your phone's camera and with the help of Google translator app for is meant for all Android and iOS devices. The translation works this way;

Once you have the Google translator installed on your device, probably Android smartphones or iOS devices. And you come across any language in the form of text or symbol which was written in anywhere, maybe on the wall, sign board, paper or book. Just launch the Google app translator and click the camera icon in the app. Now, your camera should start scanning while you place it where you want it to scan and translate probably the text. Then, the Google app while translating the text uses optical character recognition (OCR) to automatically interpret what you want to translate. That's it, although it is not perfect but trust me, it will surprise you. This can be very easier than the Google translator that requires you to type in your text before it can interpret it.

5. Look to the Stars
While few of us can ever boast to be blessed with the same sort of abilities as Brian Cox or Sir Patrick Moore, we can still revel in all that the stars have to offer from the comfort of our own homes (or gardens, anyway) thanks to apps like Star Chart and Google SkyMap.

Using AR, they allow you to point your phone skywards at night and get a fascinating overview of all those little lights. SkyMap gives you the names of stars and tells you where to point your phone to see certain planets. You'll feel like a Greek god in no time.

6. Use in Visual Search
With your mobile phone camera, you can be able to search Google with pictures or images, instead of going by typing text. This can be educational and fun catching. There are several search apps that can allow you to snap a picture using your phone's camera and after that, they enable the picture to be used in searching on Google search instead of text.  For example, you might snap a device probably, a handset or laptop and search it on Google. The result of the search engine would be on the available details/information of the snapped product. Also, you snap a photo of a tourist attraction, and search it, the result will be out displaying the center for the tourist, location, and much more related information.

7. Solving Mathematics Problems
If you are the type of student that find it difficult to understand or solve math problems, you can make use of your phone camera to perform the wonders with the help of an app called "Photomath".

The app is good for students to use when solving any related math problem. You can as well go for it.

8. Serve as Mirror

This is common, use of phone camera especially among the female folks. You see them constantly checking their face and makeups using their phone camera. Isn't it?

9. Serve as a Security Component
Do you have an old camera phone that you are not using anymore? Do you have more than one camera devices? The truth is, you can use your phone camera for surveillance and security purposes just like CCTV

10. Check Electronic Remote Control 
Another important use of your phone Camera is to check if a remote control is functioning. To do this, just let the remote control of your TV, DVD or decoder etc, face your camera, then press any button on the remote controller and you will see a dull red light blinking as you press the keys. This is made possible because the camera lens detects infrared beams which remote controllers makes use of. So before concluding that your remote battery is dead or the remote is faulty, use your camera to run a simple test.

11. Educational Purpose
Are you the type that is lazy in writing not in the lecture hall, you can as well use your camera to snap all your friends note. Have you done this before? Many people into this already. Students always go for things that makes life simpler and easier for them.

12. Detecting Hidden Camera
Hope you know that there are hidden CCTV spy cameras in some many hotel rooms? You can simply use your phone camera to figure out the particular spot and where the camera is mounted especially in dark rooms. Just take a shot in a dark room, if the picture shows signs of rays of light, then there's a camera in the room. This is not just applicable to hotel rooms only, but any other dark place with surveillance camera.

Wednesday 30 November 2016

Marshmallow And Other Android Versions

 Leave A Reply


  A lot of us are starting the have the marshmallow update sent to us, well some of us upgraded manually, in general, the marshmallow update is fast becoming a thing of the past.


  But thats only if we let it, I know we all rooted and also have xposed installed on our phones, which enables us to fully customise and personalise our device without really altering our software.


  Of course am an Hot 2 user, fully rooted and fully xposed, and I have taken the time and pleasure to test out many of the modules that are available out there. So am gonna be dropping links of the must have modules for marshmallow, you can use the comment box to request for any module that u think caught your attention.

1. Gravity Box MM:
This is the ultimate tool that you need for that enhanced features for your hot 2 and other marshmallow devices. It enables you to tweak your:

*Status bar
*Navigation bar
*Power
*Display etc

Download GravityBox MM Here

2. MinMin Guard:
Estimates show that almost everybody hates ads, they can be really annoying, luckily this app also hates ads too and it works for android devices from 4.0+ that has xposed installed. Perfect offline adblocker.

Download MinMin Guard Here

3. Xstana (Nav. And Status Bar Module)
This is a very lovely module, sincerely I got bored of seeing those "shapes" everyday, until I stumble upon xstana,you've gotta install this module. You can also use this module if you don't have a Nav. Bar for your status bar.

Download Xstana Here

  There are a whole lots of Modules out there but I really can't say much on them, so below are the list of Working, Partially working, and Not working Modules for Marshmallow devices (NB: Modules would work on other Android Versions)

Working:
1++ calculator
4G/LTE switcher 1.0
20 MP Superior Auto
ACDisplay
ActivityForceNewTask
AdBlocker
Advanced power menu+
All Notifications Expanded
Always Expandable Notifications
Always Correct
Ambient display mod
Amplify
App settings (pylers build)
AppOpsXposed
Battery Shutdown Manager
BootManager (possibly SIM bugs)
Bright Lockscreen
BubbleUPNP's Audio cast
Burnt Toast
Call Blacklist Pro
Chrome New Tab
Chrome PIE
Clarity
Clean Lockscreen (can't get rid of mic icon tho)
Cool tool
Copy toast
CrappaLinks
Custom share
Desk Clock Alarm
DisableFlagSecure
Disable Fullscreen Keyboard
Disable Instagram Double Tap
Disable Proximity Sensor (crash during 3D youtube videos)
Disable su indicator
DoubleTapToSleep
Enable ambient display xposed (beta v1.2.3)
EnhancedToast
Eye Preserver
FakeGapps
Fake wifi connection
Flat Style Bar Indicators
Flat style colored bars (updated)
Flat Style Keyboard
Flying Android
Fonter
Force Fast Scroll
Force immersive mode
G4 Tweakbox
Gmail attachment size
Gravity Box MM (official)
Greenify (use latest beta, may cause instability)
HideBatteryLowAlert
Hide Carrier Label
Hide Xposed IME
Hijri Clock
HowGiveLolli
Instagram Themer
Intelli3G
Knock Code (updated 1/17)
Lollistat (updated for MM)
LPThemer
LWInRecents
Lockscreen music art remover
Lockscreen Widgets (widget not detected by zooper)
Materialised xposed (working for some)
Maxlock (possible freezing)
Min min guard (possible freezing)
Minimum brightness
Native Clipboard
NetStrength
Network Speed Indicator
Neversleep
Nexus navbarZ
Niwatori
No Lock Home 2
No device check
Nowakelock
NotifyClean
Play Store Changelog
Powernap
Prevent running
ReceiverStop
RecentApp Clear
QuickPic2Gallery
Root cloak
Screen Filter
ScreenOffAnimation
Serajr Blurred System UI (1.1)
Smart network 2
Smooth System Progress Bars 1.5.0
Snapcolors 3.4.12
Snapprefs (new MM update)
Softkeys Fade Mod
Status Bar Download Progress (updated 1/17)
Statusbar Scroll to Top
Swipeback 2
Swype Tweaks
Trusted wifi for smart lock
Tumblr Adaway
Ultimate Dynamic NavBar Pro
Unicon beta (only on permissive)
UnrestrictedGetTasks (1/17)
Unwatch
Ussd inbox
Volume steps+ (Updated)
Volume unlinked
WhatsApp Emoji Replacer 2
WhatsApp Tuner 1.32
WiFi Key View
Xblast
Xcooldroid
XGELs
XGPM
XHangouts (updated)
Xinsta (working with new version)
XKindleMod
XLDrawer
XLed
Xnotifications
Xorware 2G/3G/4G Switcher
Xorware All in One Widgets
Xposed Additions (updated)
Xposed GEL Settings (beta)
Xposed torch (updated 12/29)
Xprivacy
Xstana
XuiMod
XXSID Indicator
YouTube adaway
Zoom for instagram

Partially working:
Awesome popup player (working for some)
Boot manager (working for some)
DirectApkInstall (installs apk but it package installer doesn't appear)
Gesture Navigation
Lockscreen Disabler (ambient display broken)
Moto Checkbox
Native Freezer
Physical Button Music Control
Restore notification ticker on Lollipop (Prevents heads up from working, but doesn't show ticker text)
TabletMetrics
Wanam kit
XBridge
XInternalSD
XTether
XToast (working for some)
Xinstaller (bootloops for some people)

Not Working:
Audio BT
Audio balance
Audio stream music default
Complete Action Plus (no effect)
Dont Swipe
DynamicAlarmIcon
Exchange Security Bypass
Exchange User Agent Fake (1/17)
HandleExtStorage (1/17)
Hideable Nav Bar
iFont
IMEI Changer
Insert Custom Text (installs but no effect)
Lock screen clock mods [LP]
MagnetOff
Mobile radio active fix
Native Clipboard (non functioning)
Native Freezer
PBCM
PinNotif
PlayPermissionsExposed
Playstore link in App info
ScreenshotDelayRemover (no effect)
Shortcut in app info
SIM Number Changer
SwipeUpToSleep (no effect)
Tinted Recent Panels
True Silent Mode
Vibration tuner
Wifi Filter
Wifi Key View (does nothing)
XBatterythemer
Xclip 2.0
Xtended Nav Bar (does not control music)
Xposed Gesture Navigation (installs but no function)
In general, power and audio related modules are not working.

Place your comments if you have questions or requests for Modules links.

Sunday 20 November 2016

Make Zen Your Favourite Browser And Never Complain Of Airtime Again


Everyone with different and preferred browsers. For me i love google chrome because of its simplicity but, i changed to a new browser lately because it save me the cost of buying airtime for subscription and calling.
Zen browser is a browser that pays you with airtime just for surfing websites. It is very easy the more you browse the more you get airtime. If you are the type that spend half of your day on facebook, it is high time to turn your passion to airtime with Zen browser.

Where Can I download Zen browser?

>>Download from play store Here
After downloading, open the app then verify using your phone number choose correct phone operator then start surfing for airtime you will see the airtime indicator at the top in (%) once it reach 100% your airtime will be automatically credited to your phone number.

Saturday 19 November 2016

Huawei Mate 9 Lite, Full Specifications And Price
After announcing the regular Mate 9 flagship, the premium Porsche Design Mate 9 and the Mate 9 Pro model in China, Huawei has just released another version of the mate 9 and it's called the mate 9 Lite.
The Mate 9 Lite which is a mid-range smartphone comes with a 5.5-inch full HD display and a 1080p resolution. It is powered by a Kirin 655 octa- core processor with a clock speed of 2.1GHz. The device also features a 3GB RAM and 32GB of internal storage.
According to Huawei, there will also be another variant of the mate 9 lite and it will be released to the market soon. It will feature a 4GB RAM and a 64GB internal storage.

Just like the other versions, the mate 9 Lite also comes a dual camera but with no Leica. The camera is also a bit lower as it is just a 12mp + 2mp rear camera and an 8mp front facing camera.

The mate 9 Lite is packed with a 3,340 mAh lithium ion battery and it also features a fingerprint scanner which is placed just below the dual camera. It will be available in three color variations which are Gold, Grey and Silver.
Android Nougat update Now Rolling Out To Moto Z Droid and Z Force Droid
This is good news for the Moto Z users. Finally after months of anticipating, the Android 7.0 Nougat is finally rolling out to Motorola Moto Z Droid and Moto Z Force Droid. 
According to some users on Reddit, the Android 7.0 Nougat update (software version NCL26.86-11) will take just about 20minutes to install on your phone. The new update comes with new features like split-screen mode, quick app switching, new Data Saver, and also support for Google Daydream VR.

This actually makes the Moto Z Droid and Moto Z Force Droid the first set of Motorola Android smartphones to receive the Nougat update. Other Motorola Moto Z and Moto G are expected to receive the update before the end of the year

Unordered List

Sample Text

Powered by Blogger.

Sample text

Social Icons

Contact form


Followers

Featured Posts

Social Icons

Search This Blog

Search This Blog

Pages

Popular Posts

Recent Posts

Text Widget